"For I was hungry & you gave me something to eat, I was thirsty & you gave me something to drink..."

Matthew 25:35

Thursday, December 30, 2010

Peppermint Truffle Pie

um- omg, right? the above picture should have you wiping your mouth. if it doesn't- you're not human. simple as that.

i found this recipe courtesy of Cheeky Kitchen & i simply HAD to try it. so i did- and it was awesome. it was rich enough that i nixed the chocolate ganache that the recipe calls for- but feel free to indulge- i think i just might next time. sinful.

Peppermint Truffle Pie
For the Pie:
2 tablespoons butter, melted
¼ cup crushed candy canes
1 deep dish pie crust
7 eggs
1 cup high-quality cocoa powder
1 1/2 cups sugar
1 ½ teaspoons peppermint extract

Directions:
Use a basting brush to spread a thin layer of butter around the edge of the pie crust. Sprinkle crushed candy canes on the buttered edge. Set aside.

Crack the eggs into a large bowl. With an electric mixer, beat in the cocoa powder, sugar, and peppermint extract until well mixed. Pour into pie crust.

Bake in an oven preheated to 375 degrees for 45-50 minutes, or until the center of the pie is set.

Cool before serving with easy ganache drizzle, fresh whipped cream, and crushed peppermint candy.


For the Ganache Drizzle:
1 cups heavy whipping cream
½ cup semisweet chocolate chips
Pour cream and chocolate chips into a microwave-safe bowl. Microwave for 60-90 seconds, then whisk together the mixture until smooth.

For the Fresh Whipped Cream & Garnish
2 cups heavy whipping cream
1 cup powdered sugar
¼ cup crushed candy canes
In a large bowl, beat the cream with an electric mixer until light and fluffy. Add the powdered sugar and beat just until incorporated. Serve atop cooled pie, sprinkle with crushed candy canes before serving.
Pin It!

Wednesday, December 22, 2010

Chocolate & Cream Cheese Crescent Rolls

everyone loves Pillsbury Crescent Rolls- right? it's just the way it is.
i love them enough to doctor them up as often as i can.

this is one of my new favs- simple, yummy & good for breakfast or dessert.

Chocolate & Cream Cheese Crescent Rolls
You Need:
- 1 roll of Pillsbury Crescents
- mini chocolate chips
- cinnamon & sugar mix (i eyeball- but probably about 1/4 cup sugar + 1 tblsp cinnamon)
- cream cheese

Directions:

roll out the crescent rolls. spread some cinnamon & sugar mix on each one. place about 1 tblsp cream cheese on each crescent. sprinkle with mini chocolate chips:

carefully roll up & pinch (as you go) the crescent:

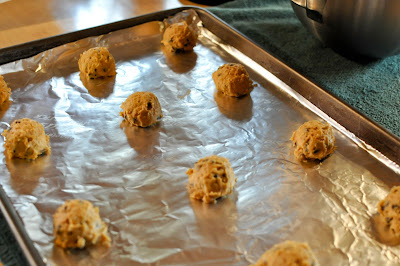
sprinkle the tops with a little cinnamon & sugar mix & pop on a few mini chips.

bake @ 375 for about 12 minutes (or as your oven goes)

let them cool for about 5 minutes & then try not to eat them all. that'd be gluttonous.

Easy Peasy & Delish!

i like to make these with cream cheese only or chocolate only or cinnamon & sugar only or even use different types of chips (milk, semi sweet, mint, cinnamon, peanut butter- etc etc)

there are way to many things you can do with crescent rolls & your imagination.
Pin It!

Monday, December 6, 2010

Heath Bar Cake

oh. my. goodness.
this cake is awesome. and easy. perfection. loved by all. seriously.
i made it for the husband's birthday & he loved it. as did his parents, and his work & my work.
like i said- all.

Heath Bar Cake (also referred to as the Better Than Sex Cake)

You Need:
1 box Devil's Food Cake mix
1 can sweetened condensed milk
1 jar caramel
1 container Cool Whip
4 Heath Bars

Directions:
Bake the Devil's Food Cake according to the package directions. Once the cake is done, allow to cool for 10-15 min. You can leave the cake in the pan or transfer it to a serving/carry dish (if you're going to transfer it make sure you grease/flour your baking pan REALLY well so that the cake comes right out & you don't end up with a pile of broken Devil's Food)

Poke holes all over the cake with a wooden spoon handle, fork- etc etc. whatever you've got (i used a chopstick)
Once the cake has been sufficiently stabbed- slowly pour the entire can of sweetened condensed milk over the cake. Then slowly pour about 3/4 of the jar of caramel over the top as well (i poured the caramel into a Pyrex measuring cup & heated it up for about 30 seconds)

it'll look scary wet- don't be scared. everything soaks in quite nicely.

pop the cake in the fridge overnight to let it all meld. you should REALLY make this cake the day before- the longer it soaks the better! i made it on a wed night & served it on a thursday night. 24 hours worth of soakage!

pull the cake out & clean off the edges of the serving platter (if you transferred it)- otherwise, no worries. cover the cake with the Cool Whip:

then break up the Heath Bars & pop them into the food processor:

chop & pulse until you get a nice sprinkling consistency.

then sprinkle the cake with the Heath Bar bits.

Keep the cake refrigerated until you're ready to serve. Then try not to eat an inappropriate amount.
Pin It!

Crock Pot Beef Stew

easy peasy.

Crock Pot Beef Stew

You Need:
1 1/2 lb stew chunks
1/2 cup wine (red)
1 can tomato soup
1 can beef consomme
1 can cream of celery
4 medium/large potatoes (cut into chunks)
1 tblsp onion powder
2 tsp garlic
1 tsp thyme
2 bay leaves
1/4 tsp red pepper flakes
2 tsp Kosher salt
3 tsp sugar
2 beef bouillon cubes
1 can corn
2 cans water

To thicken: (do not add till after the stew is done)
cornstarch/water


Directions:
get everything together (potatoes cut up, liquids measured out- etc etc)
toss the meat into a skillet with some oil & the garlic & sear it:

it'll take all of 3-5 minutes. then remove the pan from the heat.
now everything can go into the crock pot.
potatoes, meat, corn, seasonings, b cubes, liquid- all of it.
give it a stir & cook on low for 8-10 hours.

once the meat is tender (8-10 hours in) and everything smells awesome, it's time to thicken up your stew.

some people like flour- but i hate lumps & i use cornstarch.
i eyeball it- so use as much or as little as you want to reach your desired thickness.

i like to start with about 2 tblsp & i mix it with just enough water to dissolve the cornstarch- i then slowly stir it into the stew.
i give it a few minutes, see how thick it is & go from there.
like i said- it's your preference.

once you've got it where you want it- ladle it out & server with some crusty bread.
perfect!

FYI: i'm not a huge fan of tomato based beef stew- so i ended up draining about 3 cups of liquid from the finished stew & replacing it with water (and a little extra salt & an extra boullion cube)

this worked for me- but lots of people DO like tomato based stew. so yeah- whatever you like. i think next time i'll use 1/2 can tomato soup & see how that goes.
Pin It!

Saturday, November 27, 2010

Marie-Helene's Apple Cake (French Apple Cake)


Marie-Helene's Apple Cake (French Apple Cake)
recipe courtesy of Dorie Greenspan's Around My French Table

3/4 cup all-purpose flour
3/4 teaspoon baking powderPinch of salt
4 large apples (use 4 different kinds-I used Honeycrisp, Fuji, Cortland, and Granny Smith)
2 large eggs3/4 cup sugar
3 tablespoons dark rum
1/2 teaspoon pure vanilla extract
8 tablespoons unsalted butter, melted and cooled

1. Preheat the oven to 350º and center a rack in the oven. Heavily butter an 8 or 9 inch springform pan (i used a 9 inch). Line a baking sheet with parchment paper and put the springform pan on it. Set aside.

2. Whisk the flour, baking powder, and salt together in a small bowl.

3. Peel the apples, cut them in half, and remove the cores. Cut the apples into 1 to 2 inch chunks:

4. In a medium bowl, beat the eggs with a whisk until foamy. Pour in the sugar and whisk until smooth. Whisk in the rum and vanilla.

(the husband insisted i make you aware of the rum he "allowed" me to use- whatever. it's just rum) Whisk in half of the flour mixture, when it’s incorporated, add half of the melted butter, followed by the remaining flour mixture and butter. Mix in between additions so you have a smooth, thick batter.

5. Fold in the apples with a rubber spatula. Pour batter into prepared pan. Spread with spatula so the batter is somewhat even:

6. Slide the pan in the oven and bake 50-60 minutes (50 min was perfect in my oven), or until the top of the cake is golden brown and a knife inserted in the center comes out clean. Transfer to a cooling rack and cool for five minutes.

7. Run a knife around the edges of the cake and remove the side of the spring-form pan (remove the sides slowly & make sure there are no apples stuck to it). Cool cake until slightly warm or at room temperature. If you want to remove the cake from the pan, wait until the cake is completely cooled. Slide a long spatula between the cake and pan, cover the top of the cake with a piece of parchment or wax paper, and invert it onto a rack. Carefully remove the bottom of the pan and turn the cake over onto a serving platter.

You can serve this cake at room temp or warm with whipped cream or a simple vanilla or cinnamon ice cream. I tried it with both- i can't decide which i prefer!

This cake will keep for about 2-3 days at room temp (or in the fridge). It's really moist so it's best not to cover it with plastic wrap- use wax paper or keep in a cake dish.

Pin It!

Thursday, November 25, 2010

Baked Pumpkin Donuts

Baked Pumpkin Donuts (adapted from Cheeky Kitchen)
You Need:
3 1/2 cups all purpose flour*
3 teaspoons baking powder
1 teaspoon salt
2 teaspoons pumpkin pie spice
1 cup sugar
6 tablespoons butter softened
2 eggs
2 teaspoons vanilla
1/2 cup buttermilk**
1 cup pumpkin puree

Directions:
- In a large bowl, whisk together the flour, baking powder, salt, spice and sugar.
- Whisk together all of the remaining ingredients in a second, medium bowl.
- Make a well in the center of the dry ingredients. Pour the wet ingredients into the dry ingredients, and stir them around the bowl until the mixture is well combined.

- Turn out onto a lightly floured surface, rolling the donut dough to approximately 3/4" thick, then cut with donut cutter.

- Transfer to a lightly greased cookie sheet.

- Bake in an oven preheated to 400 degrees for 12-15 minutes, or just until the donuts are cooked through. (mine needed 13 min)
- Dip immediately into buttermilk glaze.

Eat warm & enjoy!

Glaze:***
You Need:
3 cups powdered sugar
1/2 cup buttermilk
1/2 teaspoon vanilla

Directions:
- Whisk together in a small bowl until smooth

* i ended up needing an addtl 3/4 cup flour PLUS a heavily floured surface. i had to flour the counter, the rolling pin, my hands, the dough- etc etc. without the addtl flour the dough was just a sticky mess. so i'd start with the 3 1/2 cups & see what you get. you'll know if you need more - you simply won't be able to work with the dough at ALL. just flour it up until it's workable.

** i used powdered Buttermilk (you can find it in the baking section)
*** i only made 1/2 a batch of the glaze & it was just enough.
Pin It!

Friday, November 12, 2010

Venison Roast via Crock Pot


Venison. I like it- as long as it's cooked right. If it's gamey & dry- no thank you.

I took a stab at cooking a venison roast for the first time this past weekend & i was met with SUCCESS!

Not only was it fairly easy (thank you crock pot) but it tasted like way more work had been put into it. I approve. As did the husband & in-laws.

So with hunting season upon us, here's what i did:

Venison Roast via Crock Pot

You Need:
1 venison roast (1-3 lbs- i had a 2lb roast)
milk (1-2 cups- enough to cover the roast)
1 tblsp kosher salt
1 tsp black pepper
1/2 tsp allspice
1/4 tsp cloves
4 cloves minced garlic
1-2 tblsp onion powder
1 apple (cored & quartered)
1/3 cup apple cider/juice
1 chicken bullion cube
1 cup water
cornstarch

Directions:

Un-tie your venison roast:


Place it in a 1 Gallon Ziplock bag & add the milk, salt, pepper, allspice & cloves (i kind of eyeballed it- but i gave you general amounts above)


Place the bag in the fridge & allow to sit & soak for at least 10 hours (or overnight)

Directions Continued:

Once you're ready to put your roast on, pull it out of the fridge, discard the milk & rinse off the roast (doesn't have to be super rinsed, just enough to get rid of the majority of the milk. The spices should stick to the meat (that's not an issue)

Set your roast aside & get your crockpot ready. I used a crock pot bag (not having to wash your crock pot is the best) and rubbed about 1 tblsp olive oil inside.

Set your roast in the bottom & toss in the apples. Add the garlic, onion powder & cider/juice:

The meat won't be covered in juice, and that's ok. This is a long & slow cooking process, so no worries about drying your meat out.

Put the lid on your crock pot & turn it on LOW.
Leave it alone for a minimum of 6 hours (so no looking, lifting the lid, poking or prodding. leave it be!)

You can check the meat in 6 hours to see how tender it is- i cooked my 2lb roast for 7 hours & it was PERFECT! likw- just perfect! 6-8 hours is the norm.

Once your roast is done- discard the apples & remove your roast to a serving platter/bowl.

Now to make the gravy: (you can do this in the crock pot or in a pan on the stove- i used a pan on the stove because of the crock pot bag & the fact that i like my gravy nice & thick & it takes way less time on the stove than in the crock pot) Take the juices from the crock pot bag & pour them into a pan. Add the 1 cup of boiling water & the bullion cube. Turn the heat on medium & stir until the cube is dissolved: (i initially tried to simply do this in a glas sbowl- ut you need the heat to thicken- so i transferred it)

Use the cornstarch (i like to mix my cornstarch with a small amount of water BEFORE addding it to the pan- no lumps!) to thicken as desired.

I tossed in a bit more salt & pepper to taste.

And now it's time to eat. I served the roast & gravy over mashed potatoes:


It was awesome. The meat was SUPER tender & moist & the gravy was a slightly apple & onion & sweet & salty. And it was perfect over mashed potatoes- so i highly suggest going with those.

This served 4 people perfectly (2 big eaters & 2 smaller eaters)

Enjoy!
Pin It!

Wednesday, November 10, 2010

Rocky Road Crock Pot Cake

So i was looking for a crock pot dessert & stumbled across this one. It sounded good, it looked good- so i had to give it a go.

my verdict will follow... (see my UPDATE at the bottom before making)

Rocky Road Crock Pot Cake

You Need:
1 (18.25-oz.) package German chocolate cake mix*
1 (3.9-oz.) package chocolate instant pudding mix*
3 large eggs, lightly beaten
1 cup sour cream
1/3 cup butter, melted
1 teaspoon vanilla extract
3 1/4 cups milk, divided
1 (3.4-oz.) package chocolate cook-and-serve pudding mix (i used vanilla)*
1/2 cup chopped pecans (optional- i didn't use)
1 1/2 cups miniature marshmallows
1 cup semisweet chocolate morsels
Vanilla ice cream (optional)

Directions:

1. Beat cake mix, next 5 ingredients, and 1 1/4 cups milk at medium speed with an electric mixer (used my Kitchen Aid) 2 minutes, stopping to scrape down sides as needed. Pour batter into a lightly greased 4-qt. slow cooker.
2. Cook remaining 2 cups milk in a heavy nonaluminum saucepan over medium heat, stirring often, 3 to 5 minutes or just until bubbles appear (do not boil); remove from heat.
3. *Sprinkle cook-and-serve pudding mix over batter. Slowly pour hot milk over pudding. Cover and cook on LOW 3 1/2 hours.
4. (optional if using pecans) Meanwhile, heat pecans in a small nonstick skillet over medium-low heat, stirring often, 3 to 5 minutes or until lightly toasted and fragrant.
5. Turn off slow cooker. Sprinkle cake with pecans, marshmallows, and chocolate morsels. Let stand 15 minutes or until marshmallows are slightly melted.


Spoon into dessert dishes, and serve with ice cream, if desired.

Verdict:

It turned out almost perfect. almost.
The con?

- the cook & serve pudding part. i followed the directions to a T (sprinkled the pudding mix on top- poured hot milk over that sloooowly) but the pudding & milk didn't seem to jive all the way.

when i dug in i saw clumps of dry pudding mix or weirdly chewy chunks of cooked pudding. if i'd used chocolate pudding mix i may not have even noticed- but with the vanilla it was pretty obvious.

so i think next time i'll actually whisk the pudding & milk together & then pour it on top & let it cook. chunks of un-cooked pudding = VOM!

thankfully- they were easy to discard & the rest tasted awesome.
i think next time i'll use a different cake mix too- i'm not a huge fan of german chocolate cake, so i'll grab a devil's food or something.

***UPDATE:
*i made this again & i mixed the pudding up BEFORE i poured it into the crockpot- SUCCESS! no nasty clumps & it was perfect!
*i also used Devil's Food which i much preferred.
*Lastly- i made the instant pudding = vanilla & the cook & serve = chocolate. so yeah- i say go that route!

and there you have it- a crock pot dessert!
Pin It!

Tuesday, November 9, 2010

Pumpkin Chocolate Chip Cookies

i'm always looking for new pumpkin cookie recipes. i found this one via Taste of Home & tweaked it a bit. the came out lovely- still a bit cakey/muffin like as most pumpkin things do- but good.

Pumpkin Chocolate Chip Cookies

You Need:
1 cup butter, softened
3/4 cup sugar
3/4 cup packed brown sugar
1 egg
1 tsp vanilla
2 cups all-purpose flour
1 cup quick-cooking oats
1tsp baking soda
1 tsp ground cinnamon
1/2 tsp pumpkin pie spice
1 cup canned pumpkin1-1/2 cups semisweet chocolate chips
Directions:
Pre-heat oven to 350°
Cream butter and sugars until light and fluffy. Beat in egg and vanilla.
In a separate bowl, combine the flour, oats, baking soda, pps and cinnamon; stir into creamed mixture alternately with pumpkin. Fold in chocolate chips.

Drop by tablespoonfuls (i use my cookie scoop) onto greased baking sheets.

Bake for 12-13 minutes or until lightly browned. Remove to wire racks to cool.
Pin It!

Monday, November 1, 2010

Sausage & Pasta Bake


more often than not i find myself simply throwing a bunch of food into a pan or pot, adding some spices & crossing my fingers that it turns out the way i've planned.

last night i had sausage. that's right- sausage. i cooked 1lb of sausage & i needed to figure out what to do with it so my family wouldn't "starve" on Monday night (when i knew i'd be too tired to actually cook anything for dinner)

after staring into space for 20 min- this is what i came up with.

Sausage & Pasta Bake

You Need:
1/2 lb sausage (mild, hot, sweet- whatever you like)
3/4 lb pasta (that's like 3/4 of a box or 4 cups cooked pasta)
3 cups pasta water (retain 2 1/2 cups of the water you use to boil the pasta)
1 cup white wine (i usually use Vermouth, but i was out. so marsala it was)
1/2 heavy whipping cream
2 beef bullion cubes
3 heavy tblsp capers
2 tsp caper juice
3 tblsp cornstarch
1/2 cup shredded parmesean cheese
1 cup shredded swiss cheese
salt, basil, onion powder, allspice, minced garlic, hot sauce (to taste)

Directions:
Pre-heat oven to 375º slice your sausage longways, place on a baking sheet, season with minced garlic & hot sauce & bake for 20-25 min (just like in the Zuppa Toscana recipe below)


While your sausage is cooking: Fill a pan with water, salt & set to boil. Boil your pasta until al-dente.

While the sausage & pasta are going- get the rest of your items together:

as you can see- i mix my cornstarch with enough water to dissolve it. this = smooth sauce as opposed to lumpy gross sauce. genius.

Once your sausage is done- cut it up (i used a fork & knife) into bite sized pieces (again, like the Zuppa Toscana recipe below) and set aside. (p.s. i cooked a full 1 lb of sausage, but i only needed 1/2 lb for this recipe. i'll use the rest for something else.)

Once your pasta is done- reserve 3 cups of the water & drain the rest.
As your pasta drains- pour the 3 cups of water back into the pan along with the wine, beef bullion cubes, capers, caper juice and spices (to taste).

On medium-high heat- allow the broth & wine mix to reduce by about 1/3. After it's reduced, add the whipping cream & stir. Slowly pour in the cornstarch (stirring as you do)
Reduce the heat to medium-low & allow the mixture to thicken up a bit (you can adjust the cornstarch to your pref)

Once the mix has thickened, add the pasta, sausage & the parmesean cheese to the pan & stir to coat:

pour 1/2 of the pasta into a greased baking dish (i used a 2 quart sized dish. so the 1 step down from a 9x13) & sprinkle with 1/2 cup of the swiss cheese.

then pour the rest of the pasta in & sprinkle the top with the remaining 1/2 cup of swiss cheese.

bake at 375º for about 20-25 min (i spray some foil with cooking spray & cover my pasta. this cuts down on crispy noodles & burnt cheese. i take the foil off for the last 5-10 min of baking time.)

yum.

as i said, this is actually for Monday night's dinner (i held off on baking until tonight) but i did have enough extra to fill one of my personal sized casserole dishes. so i baked that & the husband ate it last night. he deemed it "delicious".

Pin It!
Related Posts with Thumbnails